Showing posts with label diecut. Show all posts

Monday, 26 August 2019


Over at Card Exchange Photos on Facebook, link might not work as it is a secret group - just type the words into the search feature. We exchange cards every month with a partner, chose by our group mom Carole, this month as an added extra we did our annual 7 days of Summer swap, where we were allocated a partner and then we put together 7 crafting gifts, normally 6 at a £1 and then 1 for £4, its a good way to pass on some stash that you've had for ages or do a bag full of die cuts etc. Its good fun and you get bits n bobs you wouldn't have necessarily bought yourself, I always find these are the best gifts as I always end up using whatever it is, some totally random.

Anyhoo, as a thank you to Carole for arranging everything I thought I would do her a thank you card using  something she sent me this swap - the yellow decoupage flowers. (I think the trellis might have come from her in a previous swap also)

Love the bright colours which all came together to make a pretty card.


backing paper - 
Websters Pages - Best Friends Collection
die cut trellis in white card
The Works doily die in white card
random circle die in lime green paper
The Works doily die - Best Friends Collection
Tattered Lace 'Cherished Centres' die in lime green paper
decoupaged flowers
gold gems


Amanda xx

Monday, 1 January 2018

Courtly Love Customer Challenge

Happy New Year!!


A new month means a new Customer Challenge at the Gecko Galz and the theme for the month of January is 'Courtly Love'.

So why not play along, join the challenge with the chance to win $25 at the Gecko Galz Shop

~~~


It was lovely to do a card which wasn't a Christmas card, I think that's why I went a bit crazy with the pearls, add my undying affection for Mr Darcy and it all went a bit.......


image from 'Vintage Flirtations' design sheet 
paper from 'Courtly Love' Paper pack 
burgundy paperstock
pearls, lots & lots of
Spellbinder frame die
quote from Jane Austen, Pride and Prejudice Mr Darcy, superbly acted by Colin Firth

Using an A4 sheet of white card I measured about 29cm along the long side and about 16cm on the short side and cut the card accordingly.
I then measured 10cm along the long edge and scored down the card to make the front of the card.
(this size card will just about fit into a C5 envelope, might have to do a little snipping to fit properly)


I resized my image using Craft Artist to use as the topper for the front of my card, also did the same with my chosen backing paper  (using the measurements of the long edge with the 10cm taken off) and printed both off. 
To make the quote topper I used the same backing paper but cropped it so it was just the plain pink area, typed my chosen quote (sheesh, it took me ages to find the one I wanted to use!) and then printed it out. With hindsight, I should have made the font a teeny bigger.

I backed my topper with a panel of burgundy card and then stuck it onto my card, I stuck the backing paper straight on to the card.

Using the SpellBinder die I centred the quote in the middle and then die cut it out, then die cut a piece of burgundy card stock to go underneath it.

Lastly I added the pearls, and more pearls.

All I can say is........ 'Oh, Mr Darcy!'


disclaimer - Neither Mr Darcy, nor Colin Firth were harmed in the making of this card 😍

~~~

I hope you'll join in with our 'Courtly Challenge' where the Winner gets a $25 shopping spree to spend at the Gecko Galz Shop. (The only rule is that you must use at least one Gecko Galz product... this can be one of the freebies or, of course, you can buy at the Etsy shop)

If you sign up for the Gecko Galz monthly newsletter, you'll be kept up to date with new releases, $1 Wednesday deals and claim a free digital collage sheet!

If you pop over to the Gecko Galz Blog, you will see all the fabulous designs by the very talented Design Team - and maybe a freebie or two!

If you're on Facebook, head over to the private Gecko Galz Papercrafting Group where there are four monthly challenges, each theme has a digital collage sheet as a prize.


Amanda xx


Monday, 18 December 2017

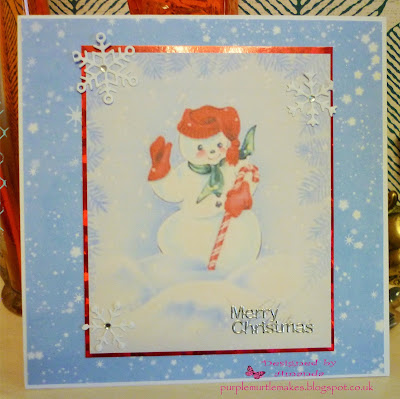
Frosty the Snowman

Retro style Christmas card today, using a cute Snowman image from Gecko Galz 'Frosty' design sheet. The blue backing paper is a HunkyDory one - one of the crafting magazines digital freebies I came across, I printed it out onto an A4 sheet of card and it just about matches the blue  in the image.

In one of the swaps I took part in over at CardExchangeUK was some gorgeous patterned holographic card - the red one was just perfect to bring out the red hat & gloves Mr Snowman is wearing.

Totally in love with my stringed snowflake die at the moment, so I cut another one out and snipped the individual flakes out, to embellish this card, then stuck silver gems in the middle, and used a silver peel off sentiment to finish off.


Pop over to the Gecko Galz on Etsy to find many more retro/vintage images.

Monday, 28 November 2016

N for not square & navy

Oh I missed my butterflies!

I love how this card turned out, wasn't sure at first, but after a few little teaks here and there, I finally got it looking right.


Using a DoCrafts 'Oval' die, I cut two in white card - and stuck them back to back to make a card (the back one has been trimmed at the bottom to make it stand up). Using the next Oval down in size I cut a piece of Prima 'Fairy Belle' and used that has the background paper.
The white flowers were coloured with Indigo Blue promarker, left these a while to dry as I didn't want to smudge the colour on the white card, then stuck large pearls onto the centres.
I used another oval die for the sentiment topper - first I found a stamp to fit it, then used Dovecraft Royal Blue pigment ink.
I glued on the flowers using silicone glue, to allow myself wiggle room to get them in the right postion.
Once everything was glued down, I die cut 4 butterflies in matching white card, using a Tattered Lace mini die and placed them on the flowers.
The final touch was adding all the smaller pearls round the ovals.

Entering this card into: butterfly challenge = N is for not square & navy

Tuesday, 23 February 2016

S is for stamping & sapphire/playground 217

I had planned to do a different style of card for this challenge, one I watched on YouTube, but when raiding my offcuts/snippets drawer realised I wouldn't have enough of the blue card to do it so had to wing it *lol*  and this is what I came up with:

 
Royal Blue pigment ink
Sentiment stamp by Jenny Ellory
Butterfly stamp by BoBunny
blue card stock
white & blue gems


The snippet of blue card stock was what was remaining of an A4 sheet, I made a 6x6 white card blank and then measured and cut a square of the blue exactly 1 inch smaller, then gutted the middle as I needed it for the die cut butterfly.

I stamped the two butterflies using the pigment ink, then decided I would put the sentiment in the middle (and not use the butterfly) but I noticed a teeny tiny smudge of blue ink in the space which I could see a mile off but no one else would probably have done! So I reverted to plan A to put the die cut there.

Matted and layered the card then attached the die cut with my Pritt stick, so I could best position it.

I then stamped the sentiment in the corner, stuck some white gems on the butterfly and decided to pop a blue gem on each of the stamped butterflies. And finished off by blinging up the corners.

entering in: Butterfly Challenge = theme + butterfly + colour

Monday, 25 January 2016

All that Glitters

This card made itself.

Yes, it did.

Because I had no idea what I was going to do for this challenge, apart from using this very beautiful lady from the Breathtaking Beauties image sheet.

I used CAP2 to resize her, and printed her out.

And that was it.

So, somehow - the velum was found, then the right colour paper was found to go underneath so you could see the pretty swirls better on said vellum, and the colour tone matched the vintage look.

I admit to using the doily.


Strip of lace, feather off of a Fairy Angel light, ribbon, flower embellishments, gems and the die cuts just happened.

The little flowers on the feather were white, so they coloured themselves Cool Grey to match up.

Do I need to call Mulder & Scully........well, maybe just Mulder?


purple blue paper
Laurence Llewelyn Bowen (yes, I had to google how to spell it) Vellum
doily
Gecko Galz 'Breathtaking Beauties'
Crafty Blitz small white flowers
Ribbon
Hobby House 'champagne' gems
Do Crafts stamp.
Do Crafts corner die
snippets of brown design paper from The Works.


obligatory Laurence pic


Entering in: Gecko Galzs = All that glitters
                    Snippets Playground = -week 213


Tuesday, 19 January 2016

Make it sparkle

Had planned to make this atc yesterday, but after a receiving a phone call from work regarding potential staff cuts, I couldn't get into the creative mood. Although through boredom in the evening I ended up watching 'how to' crochet and giving that a whirl. Mmm, that may take some while.

So, today my muse was back and welding sticky tape and scissors!

Now this atc is a spoiler for a card I have made for the Butterfly Challenge this week, as I had an idea for this background whilst doing something for the card front. More on that tomorrow...

Butterfly die cut
Papermania Holographic embossing powder
Woodware purple gems
Background - Stazon ink 'Vibrant Violet'
Leaves stamp by 'From the Heart' Jenny Ellory
Inkadinkado Glam Gold ink
Enchanting stamp from 'Fairy Belle Collection' by Jodie Lee Designs
Encore Metallic Bronze ink
I die cut two butterflies, one for the template and one to use. I pressed the template to the card with one finger and very carefully, using a sponge dabbed the violet across the butterfly and its surrounding area till I was happy with the effect.

I then stamped the leaves onto the background, making sure not to go over the white outline.

I then stamped over the 2nd butterfly with clear ink for embossing, and used the holographic powder.

Once the butterfly was done, I used silicone glue to stick it onto the atc, I used a big blob of it, right down the body of the butterfly so it raised it up so you could see the white outline underneath.


As the glue was drying, I stuck 4 purple gems onto the B'fly. Last thing to do was stamp the sentiment in the top left corner, which I should have done BEFORE gluing the b'fly *lol*


Tuesday, 28 July 2015

oodles of doodles

Wanted to do something quite simple, so ended up with this black and white card, using my first member's gift from Create & Craft - the Tattered Lace die 'with love' (and 'best wishes') I love how it turned out.