Thursday 29 January 2015

coffee love

5.5 x 5.5 card done for gecko galz challenge blog,

 
Gecko Galz image from Retro Love Story design sheet
Me to You 'love' papers
sentiment
black mirror card
red mirror hearts

Cut out and resized image in CAP2, framed it with a heart with black edge, then copied & pasted the heart, resized that slightly larger and filled with red. Layered that behind the original heart and that became my topper, ready to print off.
Can't remember the type font but I thought it would fit with the retro style of the card.

printed everything off and assembled the card, I edged the topper with a red promarker just to give it a edge off the card, cut the words out & glued into place. Was stuck for embellishments, went hunting in my 'heart' jar and found these prefect hearts in red mirror card.

entering card into: gecko - all you need is love

Wednesday 28 January 2015

box of delights

This months challenge over at 
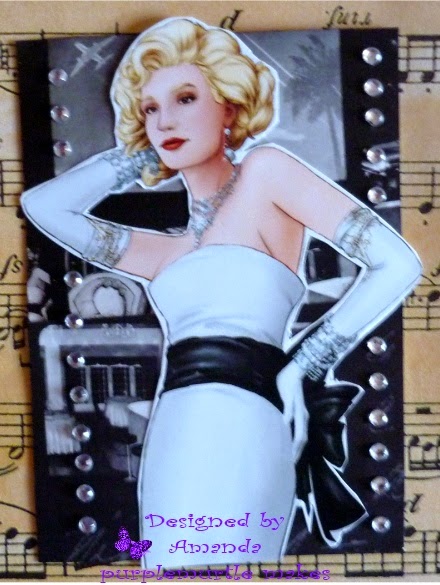
fripperies and butterflies was to use the this absolutely gorgeous digital image, in your design

As soon as I saw it I thought chocolate bar.......or rather a lovely label for a gift box for a choccy bar!
 
(I'd just read the January issue of DoCrafts Creativity and there was a piece/recipe on how to make a small box suitable for chocolate bar sized gifts)
 
So I measured, scored and cut, stuck, coloured and glittered (didn't eat any chocolate, had a handful of peanuts & raisins).
 
 
Hot off the Press "Soft Nostalgia" turquoise & pink paper
doily
image
Papermania "Simply floral" paper & pastel ribbon
vintage buttons
cord from a necklace
butterfly
gold glitter 
Glam Gold pigment ink
 
Followed the instructions on constructing the box, (used thin card so it would be pliable) I then stuck the turquoise backing paper round it NB this would have been much easier if I'd stuck the backing paper to the sheet of card before I started!
Using the pigment ink I patted the pad round the edges and on top of the box, to give it an aged look.
I then cut a smaller pink backing paper up and stuck it to the top.
Had already resized and printed off the image, so I positioned half a doily underneath (coloured with pastel beige promarker to make it look more creamier) the image, then layered both onto the pink paper.
I fussy cut the roses out of the Simply Floral paper, in fact I cut two bits, its decoupaged but you can't see it in the photo., then I added a little gold glitter to the tops, just for a bit of shiny. Stuck those to the corner of the box, slightly hanging over the edge.
To balance the left side out I foraged in my BIG tin of vinatage buttons (this will be shown on a later post... my goodness its button heaven!). found 3 I liked, tied a bow using a piece of pink cord cut from a necklace I no longer wear... and I no longer speak to the 'friend' who gave it me  - karma. Stuck them on.
Used another pink butterfly (see earlier atc post) - these are actually cake toppers but I chopped the cocktail stick off, and stuck that to the other corner, because it looked empty.
 
Finally (phew - my fingers are aching) I punched a hole and added ribbon.
 
now it just needs the little gift (NOT chocolate) I bought for part of Pay It Forward 2014..... little late with that, and a quick note and I can then post it to a lovely lady I know. Hope she will like it.
 
                      digitally sweet challenges - not a card or a layout


Tuesday 27 January 2015

french fancy

This card had me stumped! I originally had a totally different background paper and I just couldn't get any layout to work with the image, must have played around for at least an hour. Gave up, picked up another paper pad, spotted this paper - everything fell in place. Phew.

Seems a bit out of focus, not sure why, photo was as crisp as a.... crispy thing.

 
digital image from The Graphics Fairy resized in CAP2
sentiment done in CAP2
black organza ribbon
stick on pearls
promarkers grey & pink
The Works backing paper


Monday 26 January 2015

love flying high

 An atc done for a challenge over at wicked Wednesday.


I drew the wobbly lines/squares (on purpose *lol*), coloured in with pale pink & black promarkers then stamped out a 'mini candi heart' (designed with circles were the candi then gets stuck), promarkered it black then stuck matching candi on. Added two wings (was a butterfly - cut in half) and then stuck it all down. Added the quote has an afterthought.
 

Saturday 24 January 2015

two for one

Birthday card done especially for a friend's birthday.


Used elements from the Gecko Galz email freebie design sheet for January, copied out the bird postcard, resized it to fit my chosen card size, because I had paper space left I also duplicated the image & randomly resized just to fill the paper, also did a couple of sentiments.


Gecko Galz freebie
Do Craft pastel ribbon freebie
dress maker pins
lace scrap
The works backing paper


Once the card was done, I was going to do an atc with the bits & bobs left, but decided to do this cute little birthday tag.


same as above
pink mulberry paper
ribbon scraps
 
entering the tag into Gecko Galz Papercrafting Challenge Group over on Facebook.


Wednesday 21 January 2015

scrapbook layout


100% digital scrap page done in CAP2, using the Indie Chic kit. The layout inspiration is from the current issue of Do Crafts magazine - Jo's 'flowers from mum'.

entered into: digitally sweet - layouts only

Go Girl!!


Normal blog service will be back to normal as soon as possible - obviously Blogger didn't save my layout!!!
If you can bear to keep looking, this is a sparkly atc done for a wicked wednesday atc challenge, but not entered as I missed the closing!!


bits of Debbi Moore glamour & glitz
stick on shiny gems


Tuesday 13 January 2015

a rose for Charlie

 
"Peace and tranquillity is but a dream, can anyone make this dream come true? Trust to fate?"


 mulberry/fibre papers
Debbi Moore white rose design sheet
fine black pen
words & grammatical errors by me


Wednesday 7 January 2015

2015 - new ideas & projects

So I decided to push myself into new challenges this year. normally its all fiff faff and it kinda fizzles out a couple of days after I get all roared up but not this year!! I am determined to try new things/........ and whilst in that frame of mind last week, I came across this fairefoxes blog, and this post and thought FATE!!!, so I immediately joined the journal challenge.

Having no paperbook/notebook/album/journal I didn't know what to use but as I was tidying my stash I came across some 8x8 pages I'd bought from The Works, one was of a wall and I knew what I wanted to do.

Looking round the t'intenet & fellow group my journaling isn't exactly run of the mill journaling at the moment but I can but hope.

Plain & simple for my first ever page, just used promarkers & pens & a favourite quote.


then I got messy, apparently I am a grungy dark kinda girl *lol* the page is best viewed tilted in the light, as you can see the embossed bits better than you can flat/dark but then that led me to the wording ,so I guess my plan worked *cough* (I hate my hand writing)


goodness knows what my 3rd page will look like.

The pages will be put together, randomly, and hole punched & tied with something....... or not.

Sunday 4 January 2015

love conquers all


image from "Marie's Garden pt 2" design sheet
background paper "Steampowered" from Steampunk Paper kit
 
all from Gecko Galz
 
designed in CAP2
 
100% digital
 
 
From the design sheet, I cut out my chosen image, placed it onto a blank page and using a heart shaped digi punch, punched out the main bit of the image, I was just going to use that but then decided to use the 'off cut' as well and started layering the page up till I got the look I wanted. I altered the transparency of the background sheet to give it a faded look. Added a red square which I then placed behind the main heart to matt & layer a contrast, the shade of red was taken from the large rose so everything matched.
I tried to match the hand writing on the image as best I could and faded the words a little bit to make them look worn 7 faded into the paper.

I wanted to embellish it a little as it looked quite plain around the edges but couldn't find any embellishments I liked so I ended up matt & layering the image and reducing it in shape to fill the gap.
Another idea to fill the gap would be to write a sentiment or little poem to whoever the card was meant to be for.
If my printer was good, I would print it all as is, but if I do make this into an actual card I will just use the images as my ink tends to be a bit darker than the appearance on screen. And there would be a doily involved.  (*lol*)
 
 
entered into: digitally sweet challenge - whats your favourite shape
also entered into 'not a card' January challenge on Gecko Galz Papercrafting Challenge Group over on Facebook.


on yer bike


atc made using an off cut from a birthday card done in CAP2 eons ago, added a glittered butterfly (Steampunk digi kit) with copper wire for its antennae, and some mixed threads a friend gave me.

entered into: wicked wednesday atc = anything goes